0 Cart
Added to Cart
    You have items in your cart
    You have 1 item in your cart
    Total
    Check Out Continue Shopping
    Blog Menu

    Golden Turmeric Latte Apple and Berry Crumble recipe

    Golden Turmeric Latte Apple and Berry Crumble recipe

    I love events like David Wolfe’s from last month, because I get to try the most amazing new and established plant based (vegan) superfood products.

    This SugaVida turmeric latte mix made quite the impression. It was very much love at first sip so I had to stock up for home.

    Turns out it’s not only seriously amazing with hot oat, almond or coconut milk, you can also make lots of recipes with it. It even sneaked its way into my Apple Berry Crumble and was so tasty, I had to jot the recipe down for you guys!

    If you can’t get hold of Suga Vida, scroll to read what you can use instead. Hope you love this recipe too...


    FRUIT FILLING
    1/2 cup x Coconut sugar
    1 tbsp x Cinnamon
    1/2 cup x Hot water
    4-5 x Apples, peeled and sliced
    1 cup x Frozen berries

    CRUMBLE TOPPING
    1/4 cup x SugaVida Turmeric Latte Mix*
    1/2 cup Rolled oats
    1/3 cup x Buckwheat flour
    1 tbsp x Coconut sugar
    1/2 tbsp x Cinnamon
    1/2 tsp x Pink salt
    1/3 cup x Juice from cooking the fruit
    3 tbsp x Extra virgin coconut oil, melted

    *If you can’t get hold of SugaVida, mix 1 tbsp turmeric powder, 1 tbsp Cinnamon, 1 tsp cardamom, pinch black pepper and 2 tbsp coconut sugar together.

    Stir hot water, sugar and cinnamon in a pot over medium heat until sugar dissolves. Add the fruit, stir, reduce heat and cover with lid. Stir again after 10 minutes, repeat twice more.

    Preheat the oven to 180 C / Gas 4. Preferably fan baking.

    Add the dry crumble ingredients to a Tupperware container, seal on the lid and shake to mix. Add the juice and oil, shake again with lid on. You may need to use your hands to rub in the liquids evenly and work the mixture till you have a crumbly dough.

    Transfer all the fruit into an overproof dish, sprinkle with the crumble using your hands. Bake for 30 minutes or until the top is golden brown.

    Enjoy with coconut ice cream or yogurt!

    Raw Chocolate Masterclass with Pana and Tanya

    Raw Chocolate Masterclass with Pana and Tanya

    If you think raw food is awesome and you like chocolate, you would've probably, most definitely, certainly, absolutely heard of Pana Chocolate!

    Screen Shot 2017-03-24 at 11.18.01

    No matter where I am in the world, I always make sure I sample the raw chocolate on offer and although I’ve tasted some pretty incredible treats, Pana Chocolate is still heading the leaderboard for their perfect combination of taste, texture, flavour, values and love marks.

    pana barbounis

    Can you imagine my excitement when I heard that Pana himself (I didn’t know it was a person’s name either- ‘Pana’ sounds like the best raw chocolate in the world to me) is releasing a book AND he’s coming to London from Oz AND he wants to teach us his top recipe secrets AND he wants to do it at Tanya’s!!

    Well if that’s not enough good news, how about that he is going to run this workshop for you next week, so that you have plenty of time to learn the techniques right in time for the healthiest most delicious Easter!

    Screen Shot 2017-03-24 at 11.30.43

    The recipes Pana will demonstrate are:

    Chai filled chocolates
    Strawberry Basil tart
    Mini Lamingtons (very Aussie for you)
    Bloom breakfast bars

    And if all THAT is not enough, you will be the first to get an exclusive sneak peek into how we are progressing for the re-opening of Tanya’s Reinvented, sample everything we demonstrate, be able to purchase a copy of the book for only £15 (or bring yours) and have it signed by the master himself, and go home with 2 x Pana Chocolate bars!

    Book your ticket now>>

    Screen Shot 2017-03-24 at 11.28.20

    When: Saturday 1st April
    Time: 3pm-5pm
    Where: Tanya’s inside MY Chelsea, 35 Ixworth Place, SW3 3QX
    Fee: £45pp
    What’s included: Step-by-step raw chocolate demo, tasters of our favourites from the book, Q&A with Pana Barbounis, book signing (bring your own or buy a £15 copy on the day) and 2 x Pana Chocolate bars.
    How to book: via Eventbrite here>>

    See you there, I hope!
    It’s my first workshop in over a year and numbers are super limited, so we’ll have full house in no time (don’t say I didn’t warn ya!)
    Happy Friday!

    Screen Shot 2017-03-24 at 11.19.27

    Allergen free birthday cake (no nuts, dairy, eggs or gluten!)

    Allergen free birthday cake (no nuts, dairy, eggs or gluten!)

    lake maher turns 1

    My baby turned ONE on 13th January.

    I still can’t believe it.

    Our NCT teacher once said that ‘It’s long days and short years with little ones’ and wowee is it true…

    It now takes me two days to respond to a text, three days to finish an email and based on the date of this blog post- over a month to publish a recipe.

    Gone are the days of going to the bathroom in peace; you can’t finish a single cup of tea, ever; you teach everyone to slow down and chew chew chew while eating but swallow your own plate of food, whole, together with the plate, I think, wait where is the plate then? You tidy up for more hours in a day than you’ve ever done in any given month before, yet nothing looks tidy. Daylight Savings is now about being woken up a whole hour earlier, instead of gaining an hour. You could stare marvelling at your bundle of joy for hours, yet count down the minutes till daddy gets home for bath time.

    Your days are loooong, yet a year flies by.

    It’s all so confusing being a mother and yet it’s what makes the most sense. Every emotion intensifies with a child- your hard days are really really hard and your good days make you feel like a superhuman. You look at your little person in disbelief that they’ve been here for a whole year already, but most of all that you’ve ever lived without them.


    Happy Birthday Little Lady Lakey Lake, you probably won’t remember it, but your cake was so so tasty!

    It was a moist, decadent baked banana cake, which was also free from dairy, egg or any animal food. It was of course free from anything refined and so that I don’t have to worry about you overdosing on nuts, I made the icing free from cashews too!

    The tiger nuts I used in the recipe aren’t actually nuts at all, they are root vegetables. They are naturally sweet, which means that you don’t need to add as much sweetener to recipes. They are also mighty nutritious…

    Tiger nuts have MORE iron than red meat! 

    According to Dr Axe, 1 ounce of tiger nuts has 1.8 milligrams of iron (10% of DV in a 1 ounce/30g serving) and according to Authority Nutrition, 1 ounce of beef has just 0.8 milligrams of iron (29% of DV in a 3 ounce/ 85g serving)!

    20-Tiger-Nuts_Nutrition-Graph

    More to that, tiger nuts are also full of potassium, magnesium, zinc, Vitamins C and E, plus they are high in fibre and work as a prebiotic, which is all great news to beautiful skin and a healthy digestive tract.

    These little nutty sweet nuggets can be eaten on their own, but I find them a little too chewy for my liking, so I make mylk, using the exact the same method that I do for making my almond mylk, here>>

    Here's the recipe of Lake's Birthday cake, using tiger nut milk in the icing:

    healthy dairy free gluten free birthday cake

    THE HEALTHY BANANA CAKE

    For the baked cake:

    [I made 2 of these recipes and stacked both cakes for Lake’s birthday]

    4 ripe bananas
    1/3 cup extra virgin olive oil
    3/4 cup coconut palm sugar
    1.5 cups rye (or a GF) flour
    1 teaspoon vanilla powder (or 1/2 teaspoon vanilla extract)
    1 teaspoon baking soda
    1/3 teaspoon Himalayan salt
    1 cup chopped chocolate, cacao nibs or your favourite nuts (I use pecans or cashews and add a little more coconut sugar if using anything other than already sweetened chocolate)

    -Preheat the oven to 180C.
    -Mash up the bananas in a large bowl, using a fork. Stir the olive oil through, sprinkle with all remaining ingredients, except the chocolate/nuts, and stir really well. Finally add the chocolate/nuts and stir again.
    -Oil the inside of a removable base cake tin or line a cake tin with tin foil (I use 7inch tins). Pour in the mixture, not forgetting to scoop out everything from the bowl with a good spatula (invest in a quality soft spatula!)
    -Bake for 45 minutes or until a knife comes out semi clean after being inserted (don’t worry if there’s a little smudge on the knife, because when it comes out too dry, the cake can be overcooked).


    For the Tiger Nut Mylk Frosting:

    [This recipe makes enough to cover 2 x cakes, halve it if only making 1]

    1 cup tiger nut mylk (same method as Almond Mylk)
    2 cups desiccated coconut
    3/4-1 cup xylitol, depending on taste
    1.5 cup melted coconut oil
    1 teaspoon turmeric powder
    1 teaspoon vanilla extract
    5 drops lemon or sweet orange extract

    -Tiger nut mylk doesn’t keep very well so it’s best to make it fresh for this recipe. Also, if you get yours out of the fridge, it will be super cold and can make the coconut oil solidify inside your blender jug WHILE blending! (Speaking from experience here :))
    -Add all the ingredients into the blender and blend on high using a tamper.
    -If you’re making this icing for a raw cake, simply pour it over the cake whilst it’s still in the ring tin and transfer to the fridge to set for 3 hours. If you’re making this icing for a baked cake, let the cake cool down completely before applying. You will notice that the icing is quite runny, so if that works for you, simply pour spoon-fulls over the top of the cake. I like the icing nice and thick (looks more lush too!), so I transfer the entire mixture into a container and place in the freezer. Every 5-10 minutes (for up to an hour), I take it out and stir it really well to avoid the development of any clumps. Do not leave it in the freezer for more than 10 minutes and if you do and the icing turns lumpy, just blend it all again.
    -Pour the icing over the top of the cake and using the back of a spoon, gently let some of it slide down the sides. You can carry on and cover the entire cake if you prefer that look.

    lady lake allergen free cake

    Raw Dairy-free Banoffee Cheesecake

    Raw Dairy-free Banoffee Cheesecake


    The Banoffee Pie was possibly my favourite dessert growing up in NZ.

    I’m a self confessed caramel addict so anything like Sticky Toffee Pudding or Salted Caramel Slice or Banoffee and my name is all over it!

    I literally thought that if I picked a restaurant based on its availability of Banoffee Pie, then it had to be the most popular dessert and therefore an iconic one. So can you imagine my surprise when I made it in Ecuador (for Americans and Europeans btw) and they thought I couldn’t spell or say Coffee properly ?

    Let’s settle this once and for all… Banoffee is a combo of two words: Banana and Toffee. Kinda like Brangelina or Bennifer or even Tomkat, where they make a stupidly good genetically gifted union, but are just as delicious, individually.

    Here’s my raw, unprocessed, dairy-free, gluten-free, cheezecake version of the ‘classic’ Banoffee Pie…

    BANOFFEE CHEEZECAKE

    Tanya's cafe raw food recipe Banoffee pie

    For the crust:
    1 cup dry walnuts
    1 cup pitted dates
    2 tablespoons extra virgin coconut oil, melted
    1 teaspoon vanilla powder
    1/3 teaspoon Himalayan salt

    For the banana cream:
    2 cups soaked cashews (from 1.5 dry)
    3 medium bananas, peeled
    1 cup extra virgin coconut oil, melted
    1/8 cup maple syrup
    Juice of 1 lemon

    For the toffee top:
    2 cups pitted dates, soaked
    1/3 cup extra virgin coconut oil, melted
    2 tablespoons almond butter
    2 tablespoons maple syrup
    1/3 teaspoon Himalayan salt

    Optional:
    Chocolate drizzle, melt store bought or use this recipe>>

    -Transfer all the crust ingredients except coconut oil into a food processor and process till broken down enough to resemble rice. Add the coconut oil and process again till you have a sticky ball. Transfer onto a 9 inch cake tin (make sure the base can be removed or line the dish with cling film to pull it out later). Distribute the mixture evenly using your hands and press it firmly down using your fist.

    -After soaking the cashews overnight, transfer all cream ingredients into a blender and blend on high. (TIP: if you don’t have time, soak cashews in hot water for 2 hours). Scrape down the sides of blender jug and blend again until creamy. Pour the mixture over crust and transfer to the fridge for 2 hours or freezer for 1 hour.

    -Make sure the dates are nice and soft before blending. (If they are already gooey and sticky, you might not need to soak overnight. If they are quite dry or you don’t have ‘overnight’, try soaking in hot water for 2 hours.) Transfer all the toffee ingredients into blender or food processor and blitz on high till creamy. Scoop this mixture onto the semi-set banana layer and spread as evenly as you prefer. Transfer to the fridge for a minimum of 1 hour, preferably 3.

    -If you’re drizzling with chocolate, slice the cake into 12-16 portions first, separate the slices by a few millimetres and drizzle away. Store in the fridge at all times.


    Let me know how yours turns out in the comments below…

    Acai Berry recipe collection - 1 for each day of the week!

    Acai Berry recipe collection - 1 for each day of the week!

    I love Acai. It’s a berry from the jungles of South America, which is usually picked where ever it grows wild, freeze-dried near by, blended and sent to us around the world in a powdered form. It doesn’t have much of a taste or sweetness but it packs a massive punch of antioxidants and Vitamin C and that’s good enough for me!

    You can get Acai (as a frozen block of blended whole berry plus water) in freezers of select health stores nowadays, but the below recipes are for this Superfood in a powdered form.

    I love working with superfood powders and this one is right at the top of my list. Let me know which recipe you like the best!


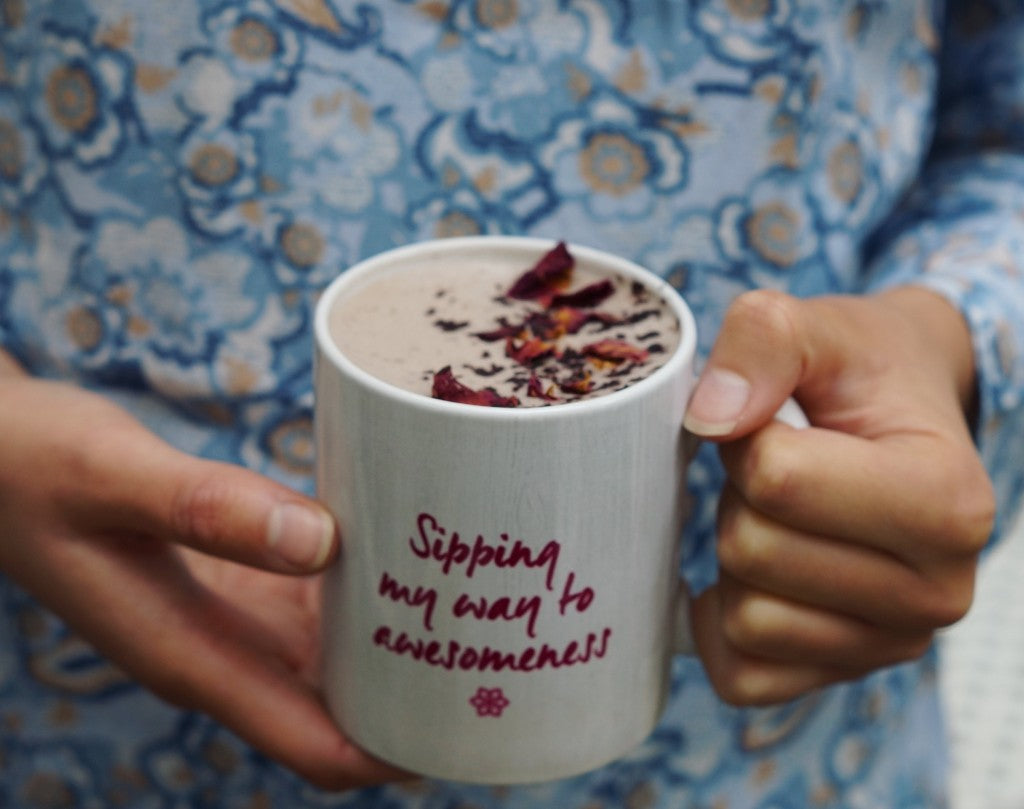
    Hot Sesame Milk Acai Berry Latte

    Dairy free Acai latte recipe

    💗

    1 tbsp tahini (raw or lightly toasted)

    2 medjool dates, pitted

    1 heaped tbsp Acai powder

    1 cup hot water

    💗

    Pop all the ingredients in a blender and blend on high for 30 seconds. If your blender isn't very powerful, blend for longer to break down the dates fully. Transfer to a mug and enjoy.

    No Dehydrator Choc Chip Acai Berry Cookies

    No dehydrator raw food cookie recipe

    💗

    For the cookies:
    1 cup dry cashews
    1 cup raisins
    1/2 cup desiccated coconut
    3 tbsp coconut oil, melted
    2 tbsp acai powder
    2 tsp vanilla extract
    1/4 tsp Himalayan salt

    💗

    For the chocolate chips:
    ¼ cup coconut oil, melted
    ¼ cup cacao powder
    1½ tbsp agave or maple syrup
    ⅓ tsp Himalayan salt

    💗

    Process all the cookie ingredients except coconut oil, in a food processor until broken down. Add the oil and process again. Divide up the mixture into 5 equal portions, form them into balls and press flat greaseproof paper. Use your fingers or a spatula to smooth out the edges of each cookie.
    -Prepare the chocolate chips by melting the coconut oil in a dehydrator or a double boiler, add the remaining chocolate ingredients, and stir until all the clumps are eliminated. Pour this over a clean teflex sheet or tin foil and transfer to the freezer to set for 10 minutes. Chop up the chocolate into desired sized chips. Press them into cookies and transfer the cookies to either the fridge or freezer to set. They can be stored in either and will keep for months.


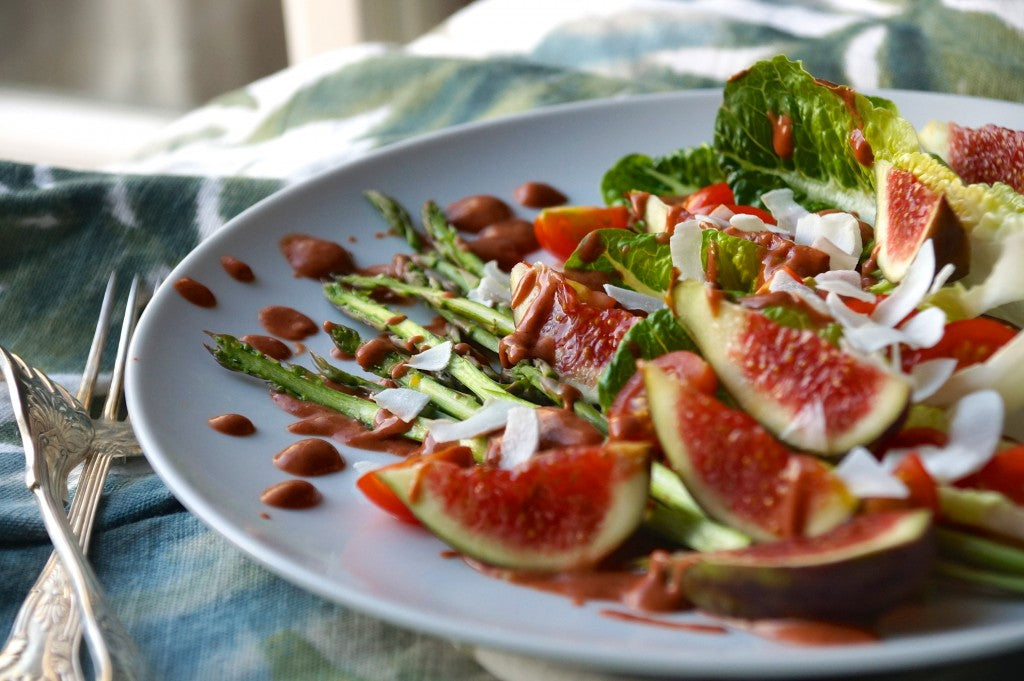
    Acai Tahini Salad Dressing

    Acai salad dressing recipe

    💗

    For the salad:
    2 heads sweet cos lettuce
    100g fine asparagus
    200g cherry tomatoes
    2 figs
    optional: avocado, coconut flakes

    💗

    For the dressing:
    1/4 cup tahini
    1/4 cup lemon juice
    1/3 cup hot water
    2 tbsp acai powder
    1/2 tsp Himalayan salt
    Pinch cayenne

    💗

    Blend all the salad dressing ingredients together. (I use a personal blender from @tribestuk which works great for smaller quantities.) Chop up the salad ingredients to your liking. Drizzle the dressing all over a white plate, assemble the salad veggies on top, drizzle a little more dressing and top with coconut flakes.


    Raw Food Acai Bowl from The Uncook Book

    Raw food Acai bowl recipe

    💗

    80g strawberries
    50g blueberries
    1 medjool date, pitted
    1 tsp vanilla extract
    2 tbsp Acai powder
    1 ripe banana, chopped and frozen

    💗

    Transfer all ingredients except banana to a blender and blend to a paste. Add banana and, using a tamper, blend on a high speed setting. Transfer to a bowl and enjoy on its own or sprinkled with granola or anything else delicious and breakfasty.


    Dairy Free Acai Cheesecake/ Ice cream Cake

    img_1512

    💗

    400g mixed berries, frozen
    230g fresh strawberries, stalked
    1 cup coconut oil, melted
    3/4 cup soaked cashews
    1/2 cup rice malt syrup
    1/4 cup Acai powder
    2 tbsp lemon juice
    1/2 tbsp vanilla powder (or 1 tbsp extract)
    1/2 tsp Himalayan salt

    💗

    Line the entire base of a 7 inch cake tin with frozen berries. (If your tin isn’t a spring form, line it with cling film first). Transfer all the remaining ingredients into a high speed blender and blend till smooth. Pour all of the creamy mixture over frozen berries and transfer to a fridge to set for a minimum of 3 hours. Turn the whole cake over onto a serving plate, then remove the tin.

    Acai Berry Smoothie

    Acai Colada smoothie recipe

    💗

    Handful pineapple chunks, frozen
    1/2 banana, frozen
    1 cup coconut milk
    2 tbsp Acai powder
    1/2 tbsp coconut nectar/ maple syrup
    1 tsp vanilla extract

    💗

    Put all the ingredients into a blender and blend till smooth. Pour into a glass and serve.


    Acai Dairy Free Cheesecake Pops [makes 20]

    Raw dairy free Acai ice cream pops

    💗

    For the pops:
    1/2 cup Acai powder
    2.5 cups soaked cashews
    1 cup coconut oil, melted
    2/3 cup xylitol
    1/4 cup apple juice
    1 cup (100g) fresh raspberries

    💗

    For the choc coating:
    1 cup coconut oil, melted
    1.5 cups cacao powder
    1/3 cup agave nectar
    1/2 tsp Himalayan salt

    💗

    Blend all the cheesecake pop ingredients on high. Open blender and scrape down the sides of the jug, blend again until creamy. Transfer to the fridge and let it set for a minimum of 3 hours, ideally overnight. Using a small ice cream scoop, form half spheres and insert a lollipop stick or straw into the middle of each. Transfer to a freezer for a minimum of 3 hours. Mix all the chocolate ingredients with a hand whisk till there are no lumps. Take a Cheesecake pop and dip it into chocolate sauce, one at a time. Turn it upside down and twist it around till you see the chocolate set, then place on a clean cold plate.