0 Cart
Added to Cart
    You have items in your cart
    You have 1 item in your cart
    Total
    Check Out Continue Shopping
    Blog Menu

    Healthy baby weaning recipes with 3 ingredients or less

    Healthy baby weaning recipes with 3 ingredients or less


    Weaning can be so confusing.

    Even NHS seem confused.

    First they recommend weaning at five months, then at six months and now they suggest that four months is the ideal time to introduce your baby to solids to avoid possible food intolerances later in life.

    The food intolerance reason does make sense to me, but I had to go with my own motherly instincts here and follow baby led weaning (which I was soon to learn is an actual thing, though I’m yet to read the book)…

    I let Lake lick fruits and my green smoothies here and there when she was four months. I added probiotics to her breastmilk when she was just a week old (via my own diet and by coating nipple in it). I added spirulina to her bottle once a week when she was about two months. When I finally decided to try out with her first ‘meal’, it was a banana and she only had 1 or 2 tiny spoonfuls. I was so excited to see how she likes it, that I blended up an entire banana, only to realise that this is not something to rush.

    For her next few ‘meals’ instead of trying out different foods in a blender, only to see them wasted, I would chew them up in my own mouth like mama-bird and feed her from a spoon. We started this process at five months with just one solid ‘meal’ per day, which quickly escalated to two ‘meals’, that also became a little bigger each day. Then instead of fitting in food in-between her milk feeds, I took one milk feed away and then another and replaced them with watered-down ‘solid meals’.

    Now at 7 months, instead of five milk feeds over the course of 24 hours, she has three milk feeds and two to three solid feeds, which are usually a decent bowl-full. Hungry growing girl.

    I try not to offer any snacks, so she understands her routine. Only water, which she happily accepts especially after rolling around all over the grass in the park.

    Lake Maher _ Lady Lake _ baby weaning tips healthy raw food vegan

    I think it’s always best to introduce little ones to solids with a mono diet and slowly add extra ingredients.

    Here are the foods Lake enjoyed immediately when they were blended up till smooth for her to swallow:

    1. Avocado, flesh only
    2. Peas, slightly softened in hot water
    3. Apples or pears, cored and peeled
    4. Banana, peeled
    5. Sweet potato, boiled
    6. Watermelon, so juicy, no need to blend, just let them suck
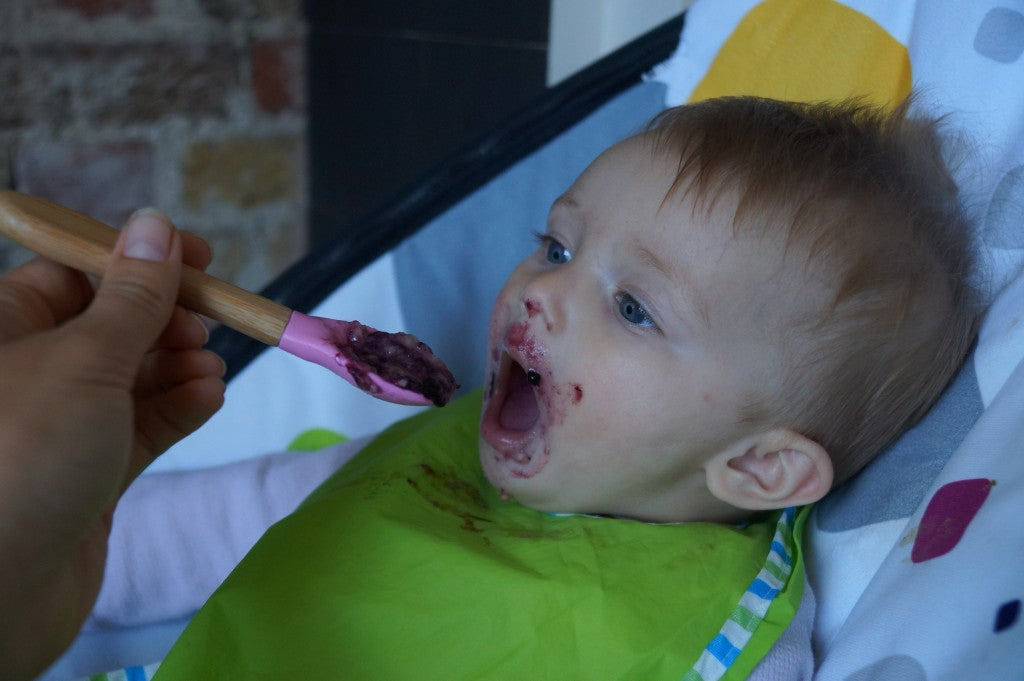
    Lake Maher _ Lady Lake _ healthy baby weaning recipes

    When it comes to recipes, I’ve tried sooooo many varieties, many not even worth mentioning, because the little lady just turned up her nose to them, no matter how hungry she was. There’s been lots of trial and error, but the below recipes are absolute winners in our household.

    There are no quantities, because only you will know how much your baby eats. If you find that there’s way too much waste, store it in the fridge and try giving it the next day warmed only by some boiling water.


    CREAMY APPLE
    Apple, peeled

    Usual milk (try seed milk!)


    -I never cook fruit, so you can assume that whenever I use fruit in baby recipes (with the exception of tomatoes- see more below), it is always raw. As fruits are super sweet already, the moment you apply high heat to them, whether boiling, heating, microwaving (may this never be you), baking or whatever, the carbohydrates in fruits transform into sugars. If you were to leave fruit simmering for hours and hours, all the liquids would evaporate away and the remainder crystallise into sugar. Cooking has its place, but in my opinion- not with fruit.

    -Peel, core and chop up the apple into the blender, add milk and blend. Experiment with millet, sunflower seed, buckwheat, hemp and pumpkin seed milks or even a mix.


    LAKE’S FAVOURITE DINNER
    Amaranth, cooked

    Tomato, organic and canned without anything added


    – Cook amaranth as per packet instructions. I usually soak 1 cup overnight, rinse and add 2.5 cups water, bring to boil, then lower heat and simmer for 20 mins or until it’s cooked to softness.
    -Everything is important purchased organic, especially when any pesticides or herbicides are about to enter the little stomaches of our children (these chemicals erupt the stomaches of insects and bugs, so since size is the only major difference between us and them, the effect pesticide-coated produce will have on us will be in a matter of time. I mention ‘organic’ next to tomato, because it’s one of those fruits all the insects go crazy for, so if they are not ‘organic’, they are 99.99% sure to be coated in chemicals. Tomatoes are also one of those very few foods that are better for us when cooked – tomatoes are rich in lycopene (the phytochemical which makes them red) and this antioxidant can be boosted with heat.

    -Blend cooked amaranth and cooked tomatoes till smooth. I use a ratio of 3:1 of amaranth to tomatoes.


    LIKE CHRISTMAS
    Oats, soaked in hot water
    Apple/pear, peeled and cored

    Cinnamon, a pinch


    -This blend is so so tasty, but just a little cinnamon would do. Try wipe it off the baby’s face as soon as eating is finished so it doesn’t aggravate the skin. (We made face masks with cinnamon as one of the ingredients at my Lush Escapes retreats some years ago and while most people had the loveliest subtle skin after the treatment, others swelled up for hours. My skin can tolerate it, but I noticed that Lake’s skin looks slightly red unless I wipe it off immediately after feeding.) Taken internally, cinnamon does wonders to balance out blood sugar levels so it’s key for sweets intake, including fruits.

    -Blend all the ingredients till smooth. As your baby grows and starts to chew, you can grate the apples instead of blending.

    -I also buy ready sprouted gluten-free oats from Planet Organic and Rude Health. They are a bit tougher than porridge or smoothie oats, so need longer soaking time in water.


    LAKE’S FAVOURITE LUNCH
    Avocado, flesh only

    Ripe Mango, peeled and chopped


    -I can’t even tell you how much mine loves this combo. She will open her mouth for more before even swallowing each spoonful! Avocado is such a versatile food and so good for everything. At 6 months, Lake could easily eat 1/2 a large avocado, which worried me at first, but babies are pretty clever and they will soon tell you if their system’s had enough. Now at 7 months, she is only excited if I give it to her every few days, not every day.

    -As both fruits are soft, I just mash them together with a fork.


    IRONKID
    Avocado, flesh only
    Ripe Pear, peeled and cored

    Spirulina, pinch


    -Spirulina is more than a superfood, it’s a wonder food! It has the highest amount of protein than any other food. Period. There is over 60g of essential amino acids that make up a perfect protein in every 100g of spirulina powder. It also has lots of chlorophyll for healthy cells and blood and it has masses of iron! You only need a sprinkling of this algae, so don’t let the price tag put you off.

    -Mash up all the ingredients together with a fork.


    BERRY BREAKFAST
    Banana, peeled
    Blackberry, organic
    or
    Pear, peeled and cored

    Mixed berries, organic


    -Tangy sweet berries go so well with creamy kind of fruits (‘creamy’ because you can easily blend these fruits and they won’t separate).
    -All berries (especially strawberries) fall into the Dirty Dozen category. These are the fruits and veggies that must always be purchased ‘organic’ or not purchased at all, because they are so heavily sprayed. (See my note about tomatoes under ‘Lake’s favourite dinner’).

    -Mash up the ingredients with a fork and that’s it.


    COCOQUINOA
    Quinoa

    Coconut yogurt


    -Quinoa, like millet, buckwheat and amaranth, is a seed not a grain. This immediately earns this wholefood more stars in my books. I don’t know why so much baby food contains rice, when quinoa is what has 3 times more protein, 10 times more minerals and only a fraction of the starches that are in rice. It’s the cost no doubt, although this is quickly changing as the demand and therefore production of quinoa seed continues to grow.

    -Cook quinoa according to packet instruction. I usually soak 1/2 cup overnight, rinse, add 1 cup water, bring to boil, then lower heat and cook for approx 10 minutes or until soft and fluffy. Transfer 4:1 quinoa to yogurt ration into a blender, add a little water if needed and blend till smooth. I kept trying to feed Lake quinoa without blending it up but she really didn’t like the texture and refused it till I tried to smooth it out.


    MASH
    Sweet potato, boiled

    Usual milk (try millet milk!)


    -Sweet potatoes are a wonderful -potato/not actually potato/ yam/ not actually yam- food for everyone. They are an excellent source of Vitamin A in the form of beta-carotin, amongst many other nutrients and minerals, without the starch content of potatoes. Simply peel, chop and boil till soft.

    -Blend the cooked sweet potato with expressed breastmilk or a seed milk from millet, buckwheat, hemp or sunflower seeds. (You can make your own by blending and straining seeds and water or you can buy a ready milk in Health Food stores, Planet Organic or Wholefoods Market).


    GROUNDING ROOTS
    Sweet potato
    Swede or turnip

    Carrot, raw


    -The carrots aren’t as starchy as other root vegetables and are perfectly fine raw. I actually try to avoid ever cooking carrots because they are already sweet enough and adding the heat, turns the carbohydrates into sugars, making them even sweeter and of course less nutritious. Peel the carrots and grate them into the blender.
    -Starchy veggies are best cooked, as the starches break down and make it possible for your (or baby’s) body to digest the other goodness in those roots. Peel the sweet potatoes and swede or turnip, chop up and boil till soft. Add to blender with a little of the water and blend.

    -When your baby starts to chew, you may like to just mash everything up with a fork instead of blending.


    MEDICINALLY YUMMY
    Avocado

    Medicinal mushroom latte (a blend of cordyceps, chaga, reishi, dates and almond milk, just like in The Uncook Book or at Tanya’s)


    -I was enjoying a Medicinal Mushroom Latte at work (Tanya’s) when Lake opened her mouth asking for a taste, I gave her a spoonful and she wanted more. It was almost her feeding time and I already had a mashed up avocado ready to go, so I stirred in some of the latte. She gobbled it up like nothing I’ve seen before. Can only be a good thing especially since Cordyceps is amazing for energy, reishi for relaxation and chaga for immunity. Plus all those essential fats for growth and protein for strength, both in the avocado and almonds, only add to the goodness.


    APRICOT PORRIDGE
    Buckwheat, cooked

    Ripe Apricot, de-stoned


    -Buckwheat, unlike its name suggests, contains no wheat. This also means that there is no gluten and it isn’t a grain, rather a seed. Check out the tips in CocoQuinoa for more gluten-free porridge options. I grew up on buckwheat porridge in Russia, so for me this baby food has sentimental value. And I’m so glad… it contains protein, calcium, manganese, fibre, phosphorus, magnesium and so much more for healthy development!

    – Cook buckwheat to the instructions on the packet. I usually soak 1 cup of groats for 4 hours, rinse them really well (takes me 4-5 go’s to get rid of the gooeyness), sprout for 1 day and then cook in 2 cups of water. After about 10 minutes, they should be nice and soft and you can pour out excess water. Add the buckwheat and chopped apricot to a blender, blend to a smooth paste.


    GREEN & GROOVY
    Pear, raw organic, peeled and cored
    Peas, softened in hot water

    Broccoli or spinach, lightly steamed


    -This combo is such an easy way to get all those greens into your baby’s diet. The sweetness and creaminess of the pear will make anything palatable, but you can also try without it at all. Just remember my reason from above for keeping fruits raw.

    -Blend everything or if your baby is chewing already, then mash the ingredients with a fork.


    MY ABSOLUTE ESSENTIALS FOR WEANING


    Tribest-Personal-Blender-Food-shot-350-500x500
    This small personal blender from Tribest! It is small enough to produce perfectly sized baby meals so there is never any waste. It’s also super light and compact, that we travel with it and even make our own smoothies on the road (bonus!).
    bamboo feeding bowl and spoon
    This bamboo bowl and spoon set! I've got a few spoon variations and this is the one that's most ergonomic and enjoyable for my little one. It also looks and feels lovely for mama (or dada) to use. And the bowl! The bowl! It has the most clever suction base, so it always remains in place no matter how much Lake wants to smack the bowl full of dangerously staining foods.
    weaning bib
    These easy-to-clean bibs! At first, I was using Lake's milky fabric bibs, but they are now entirely stained in berry spills and even banana stains which I never realised could be so intense. Now I know. Hope it's not too late for you. These bibs have sleeves too, so even clothing stays protected.
    Lake Maher _ Lady Lake - Baby weaning essentials
    This fun feeder for teething and weaning! It was a gift from Lake's Kiwi grandparents, that already have two grandchildren and four kids of their own, so they know aaall the tricks. This one is extra handy, because you can put anything inside, like grapes, cucumber, apples or watermelon and not worry about choking or even preparing anything.

    Superfood SupperClub with James of FMTV

    Superfood SupperClub with James of FMTV


    On 28th July 2014, the sunniest of all sunny days, we opened the doors to Tanya’s flagship raw food restaurant and Europe’s first ever superfood cocktail bar in the heart of Chelsea London.

    On exactly this date two years later, we want to get together and celebrate this amazing achievement with you guys!

    As always, we will be celebrating in style with a beautiful Superfood SupperClub…

    image

    This time, we have a very VERY special guest flying over from the Food Matters Headquarters in Australia to join us on the night! It’s a real privilege to have James Colquhoun host an epic Q&A session on ‘The Future of Wellness’, so needless to say, this SupperClub evening will be a one-off event. Told you it’s a special one!

    Reserve your spot on EventBrite>>

    image

    You will be welcomed with a floral summer cocktail, a probiotic appetiser of kombucha’ish soup with cultured seed cream, a protein starter of satay seaweed salad, a vibrant luxury raw food pizza for a main, a trio of the most decadent desserts, complemented by a nourishing digestive tea. For those wishing to make the most of the celebrations, we will be offering 2 for 1 cocktails, so come thirsty!

    And if all that isn’t already special enough, you will be dining on the most comfortable of cushioned chairs and lowered bespoke solid wood tables, because Tanya’s is getting a make-over and you will be the first to see it!

    image

    Tickets are just £60pp or £110 for two. Seats are super limited. No refunds available.
    7pm-9pm, Thursday 28th July 2016.
    Held at Tanya’s inside MY Chelsea, London SW3 3QX.

    Reserve your spot on EventBrite>>

    image

    About James

    James Colquhoun, filmmaker of Food Matters and Hungry For Change and founder of FMTV. Along with Laurentine ten Bosch, James founded Food Matters, giving people the tools (films, books, website, TV) to take charge of their own health. Food Matters is an internationally acclaimed widely popular documentary about the medical and healthcare industries. His latest documentary, Hungry For Change, reveals how the diet and processed food industries are the enemies of permanent weight loss, vibrant health, and natural living. From here, FMTV was born! A place where we can access vital information by watching all of your favorite inspiring documentaries, expert interviews & recipe videos in one place.

    About Tanya

    Tanya Maher is the founder of the ultimate wellness company BetterRaw.com, co-founder of a high-end gourmet raw café chain TanyasCafe.com, creator of the Amazon #1 best selling DVD ‘Raw Food 101’ and author of Hay House’s ‘The Uncook Book’. Born in Russia, raised in New Zealand and now pioneering the clean eating movement in the UK, Tanya has been hailed as one of most recognised experts in the world of raw food and the UK’s top wellness coach, by the likes of Vogue, Daily Mail and Women’s Health.

    Tanya's Talks - The Fitness Edition - Monday 18th July 7-9PM

    Tanya's Talks - The Fitness Edition - Monday 18th July 7-9PM

    events tanyas 4

    FITNESS THAT FITS YOU

    You love getting your green on and finding the healthiest choices for your day, and yet nutrition is only half the story of wellness. To reach optimum health you need to move your body.

    But what if exercise has never really been your thing? Sure you’ve tried a lot of classes, and different types of exercise. You’ve even given yoga a really good go, but somehow you lack the consistency of approach to really see a long term difference or find the body confidence you seek.

    It’s true that exercise can be hard to do, it can be challenging, overwhelming, confusing and it can be costly in time and money without always getting results.

    But when it’s the right kind of movement for you, when you get into the flow and stick with it, and when you actually see and experience the benefits… the feeling that fitness gives you can be out of this world!

    So what is the key to finding an approach to fitness that fits you?

    Our expert panel who have a flair for fitness will share their insights and tips to connect you with that fitness freedom that you’ve been looking for. Come and join the conversation with like minded people and reap the benefits for the rest of your life.

    Tanya and her alkalising welcome juice and organic energy balls will be awaiting your arrival too!


    YES PLEASE, SAVE ME A SPOT>>


    Hear from…

    Pamela Lai about New and Alternative Fitness Trends: How to navigate fitness trends and know the finds from the fads,

    Adrienne Herbert about Intuitive Fitness & Body Confidence: How to listen to your body and know when you can push yourself and when you need to rest,

    Hollie Grant about Forever Fitness: Health, vitality and toning for a lifetime, not just a season.


    YES PLEASE, SAVE ME A SPOT>>


    Here’s a little more detail of what to expect:

    ALTERNATIVE FITNESS TRENDS: HOW TO NAVIGATE FITNESS TRENDS AND KNOW THE FINDS FROM THE FADS

    Pamela LAI copy

    Pamela Lai is the Studio Manager of Slice Urban Fitness which offers a variety of fitness classes in its boutique studios in Parsons Green; over 100 classes per week including different styles of Yoga, Mat Pilates, Dance Fitness, Spinning, Rebounding, Pound Fit, HIIT, Boxfit, Pre and post natal exercise..and more! As well as managing every aspect of the studio, you will find Pamela teaching a variety of classes including Trampoline Rebounding, Barre, Aerobics, Total Body Workout and Zumba. With Zumba Pamela has had the opportunity to perform at various London events, including being on stage as opening for Beyonce’s Chime for Change concert in 2012.

    Pamela will discuss which exercise is right for you, how to choose from the variety of fitness options offered these days with some suggestions of what to try for different fitness levels, and will share examples of classes and success stories on fitness trends that worked for her and her clients  from Pound Fit to Barre, Rebounding, HIIT, Zumba etc…

    INTUITIVE FITNESS & BODY CONFIDENCE: HOW TO LISTEN TO YOUR BODY AND KNOW WHEN YOU CAN PUSH YOURSELF AND WHEN YOU NEED TO REST


    2015 Ev Sekkides

    Adrienne Herbert is a personal trainer, fitness model, mother and an advocate for women’s fitness and health. Adrienne shares her passion for fitness on her blog ‘That’sMyMum.com’ as well as contributing to Women’s Health magazine each month. Often teaching classes at fitness studios in London and Hertfordshire, Adrienne also leads talks and workshops to women about ‘Body Confidence’. For more information follow Adrienne on Instagram and Twitter – @AdrienneTMM.

    Adrienne is passionate about body confidence through women’s fitness and health. She will be discussing the importance of intuitive training specifically for women and mothers, as well as her tips to experience true body confidence.

    FOREVER FITNESS: HEALTH, VITALITY AND TONING FOR A LIFETIME, NOT JUST A SEASON


    Hollie Grant copy

    Hollie Grant is an award winning PT and Pilates Instructor, owner of 1:1 London studio PilatesPT and creator of The Model Method online. As a huge advocate of the #strongnotskinny movement Hollie believes we should think more about how our bodies work and less about how they look. This ethos is at the core of all her workouts. Hollie has earned an impressive client list through her innovative method, which includes the likes of Ella Woodward, Millie Mackintosh and Melissa Hemsley. Hollie is passionate about the lifestyle and fitness benefits of Pilates and caring for your health not just appearance. Her training technique reflects this philosophy and her dedication means her clients never fail to leave happy, healthy and strong.

    In her talk Hollie will focus on function over aesthetics. As her fitness career began with teaching Pilates and focusing on the importance of posture and muscular balance she loves to promote how thinking about how your body works, and not how it looks, is the best way to experience lifelong fitness. She will discuss what muscle imbalances are, how they affect your health, performance and posture and how they can be addressed. As well as discussing how we can change our mindset away from short term gains to long term, sustainable, achievable change.


    We’re so excited about this event!

    Bring your questions, and join us for an evening of uplifting conversations about wellness and connecting with the fitness freedom you’ve been looking for!

    Tanya’s Talks – where great advice and great nutrition meet #TanyasTalks #TanyasCafe

    YES PLEASE, SAVE ME A SPOT>>

    Terms of Purchase: Tickets are non-refundable, and non-transferrable.

    Raw Carrot Cake Recipe Video

    Raw Carrot Cake Recipe Video

    People often ask me if raw food is all about crunching carrot sticks. I can’t help myself but giggle and reply with a “nope, it’s also about drinking carrot juice, blending carrots into soup, applying grated carrot as face masks and chewing carrot cake”. I do love my giant orange Vitamin A pills! I also really love this carrot cake and think you’ll be pleasantly surprised at how similar it tastes to the baked favourite.

    The recipe is from my book, The Uncook Book (which is now also available in Polish!)


    For the cake

    150g pitted dates, soaked

    70g dried pineapple, chopped

    750g carrots, grated and squeezed to remove excess liquid

    50g ground flaxseeds

    60g ground gluten-free oats

    70g coconut oil

    75g maple syrup

    2 tsp mixed spice

    1 tsp cinnamon

    ½ tsp Himalayan salt


    For the frosting

    1 C soaked Cashews

    3 TBSP coconut oil

    3 TBSP agave

    juice of 1 Lemon

    1 tbsp vanilla extract


    -Prepare the cake layer first by processing dates and pineapple in a food processor, till they become chutney-like.

    -Add remaining ingredients and process again till well combined. Transfer the cake mix into a 9 inch spring-form tin, press firmly.

    -To prepare the frosting, firstly scrape out the seeds from a whole vanilla pod. To do so, slice the pod in half lengthwise, then use a teaspoon to literally scrape all the seeds out until the inside of the pod is dry.

    -Transfer all the frosting ingredients to a high speed blender and blend on ‘high’. Pour it over the cake and transfer to the fridge to set. Alternatively, if you prefer a runnier frosting, remove the cake from the tin and pour icing over it when serving.


    Tanya’s Top Tip:

    The base of the cake tin is not completely flat, as it has raised edges. To remove the cake easily without losing any of it that may catch on this ridge, insert the base into the adjustable tin ring so that the ridge faces downwards.


    raw food carrot cake video by tanya maher

    Click on the video above to watch on YouTube or go straight there: https://youtu.be/zV2uqCJiYGA

    Make your own 3D hand and foot casts

    Make your own 3D hand and foot casts

    It’s been over 8 years since I’ve had any white flour, processed table salt or cheap vegetable oil in my pantry, but today I’ve reunited with these items once again!

    Don’t worry, I haven’t gone back to eating them and I highly doubt we’ll see the day of me ever using the inedible ingredients in my food, but there may very well be a place for them in your life…

    Today I’m sharing a recipe you might like to try for yourself… especially if you have little ones and especially if you’re stuck for Father’s Day gift ideas!

    Below you will find all the instructions for creating your very own play dough! So fun. And more importantly, you will find instructions to creating a mould for your child’s 3D hand and foot casting- the best keepsake and gift ever! Plus you can keep making these for as long as you like and monitor your baby’s growth over the years. They will love to compare the size of their hands and feet also as they get older.


    image image

    THE STEPS COME IN THESE 4 PARTS (+ SHOPPING LIST FOR EACH):

    1. MAKE PLAY DOUGH (OR MISS THIS STEP IF USING BOUGHT PLAY DOH)

    Table salt
    White flour (or gluten free flour)
    Vegetable oil
    Cream of tartar (baking section of supermarket)
    Saucepan, cup and spoon measuring tools, wooden spoon, stove top

    2. CREATE A MOULD

    Pliable surface (ie soft plastic chopping board or dehydrator teflex sheet)
    6.5 inch/ 16.5 cm saucepan (or something else with a flat base)

    3. SET PLASTER

    Plaster of Paris (from Amazon or any art supplies store)
    Cup and ml measuring tools
    Bowl and spoon
    Plastic straw

    4. DECORATE

    Paints, brushes
    Ribbon


    IMG_6131

    AND NOW HERE ARE ALL THE STEPS. IT’S LITERALLY SO EASY AND SERIOUSLY FUN! AS YOU CAN SEE, I’VE HELD A WORKSHOP FOR ALL MY ANTENATAL CLASS GIRLS AT TANYA’S CAFE AND THEY ALL HAD THEIR BABIES STRAPPED TO THEM FOR THE FULL DURATION OF THE PROJECT, SO WE KNOW FOR SURE 2 HOURS IS PLENTY FROM GETTING EVERYTHING READY TO HAVING A COMPLETED PIECE READY TO HANG, ALL WITH THE BABY TO TEND TO.


    1. MAKE YOUR OWN PLAY DOUGH

    Ingredients:
    2 cups warm water
    1 cup salt
    2 cups white flour
    1 tbsp vegetable oil
    1.5 tbsp cream of tartar (2.5 packs from 6 pack box)

    -All in saucepan over medium heat.
    -Stir quickly till it mixes well to dough consistency (5-10 mins).
    -The dough won’t be hot so you can take it out and kneed on a non stick surface.
    -Transfer to an airtight container, where it will keep for months.

    2. CREATE A MOULD

    -Take 1/3 amount of dough.
    -Flatten into a pancake with your hands.
    -Place onto non stick AND pliable surface (must be pliable or you’ll struggle to remove it without cracking the cast plaster), press bottom of saucepan into it (apply lots of force) and fold dough around the edges to create a safe well.
    -Remove the saucepan and fix any edges that need fixing.
    -Place baby’s hands/feet/both where you’d like them in the circle and apply force all over to create a good dent.


    image image

    image image image image

    3. SET PLASTER

    1 cup plaster of Paris
    110ml water

    -Make sure everything is ready to go before stirring the plaster powder with water as it’ll start setting within 10 minutes. If you’re having a hole for the hanging ribbon- screw in a plastic straw into the dough mould at this stage.
    -Pour 110ml water into a bowl, add powder (always add powder to water not the other way round) and stir immediately and very quickly, making sure to stir out any lumps or large bubbles.
    -Pour plaster into the well, gently move the resting board from side to side to even out plaster surface and especially to fill out the hand print. Leave to set for 30+ minutes.
    -If any plaster went out the sides when you poured it, simply wait for it to set slightly (but when it’s still damp) and shave off the uneven edges with a butter knife.

    image image

    4. DECORATE

    -There’s no added benefit to leaving plaster to set for hours unless your dough is extremely wet (shouldn’t be with above recipe), so 30-60 minutes should be more than enough. Remove the straw by twisting it out.

    -Turn the entire mould with its pliable surface over and carefully peel the sheet away. Be gentle so the plaster doesn’t crack.

    -Now gently peel off the dough. It will be quite sticky and if it doesn’t come away easily, take a small drier piece of dough and use it like a sticker to go over the whole cast and collect all the stray bits of wet dough. You want to make sure that all that remains is the set plaster.

    -Leave to air dry for 5-10 minutes and apply your favourite colour in acrylic paint (take straight from tube without adding water). I recommend choosing 2 colours and using the darker as the base.

    -Take the second lighter colour (if using), apply to your finger and run it along the protruding surface of the hands/feet. This way the dark colour appears through the ‘cracks’ outlining the 3D effect even better.

    -Thread a ribbon through the hole. And voila!

    image image image image