0 Cart
Added to Cart
    You have items in your cart
    You have 1 item in your cart
    Total
    Check Out Continue Shopping
    Blog Menu

    delicious alkalising pesto courgette noodles


    As I make final adjustments and recipe testing for my online 28 day program- ACID ALKALINE BREAKTHROUGH (make sure you are on the list to get the scoop once the freebies are ready), there's one recipe I can't quite wait to share with you. I tried and I tried to wait patiently and post it once the program is announced, but think it is so good, so cleansing and so alkalising, that you really deserve it NOW. None of this waiting around...

    Serves 4

    For the noodles
    4 medium courgettes

    For the pesto sauce
    2 cups basil, packed tightly
    2 cup spinach, packed tightly
    1 cup extra virgin olive oil (or flaxseed oil)
    1/2 cup pine nuts
    1/2 cup brazil nuts
    juice of 3 limes
    3 garlic cloves, minced
    1/3 tsp Himalayan salt

    To serve
    tomatoes, marinated mushrooms, sauerkraut, salad greens, anything goes!

    - Use a spiraliser to make spaghetti out of courgettes
    - Pop all the dry pesto ingredients (everything apart from the oil and the lime juice) into a food processor and process until finely ground up. You may need to keep scraping down the edges with a spatular
    - Add the oil and lemon to the food processor and pulse the sauce for a final mix
    - Pour the ready pesto over spiralised courgettes and stir it through
    - Serve immediately with any other salady bits you like or let it sit and marinate in all the juices

    ebook bundle deal from tanya alekseeva


    Hi gorgeous!

    Don't you wish that no matter the weather, the occasion, the ailment or the craving- you had a raw food recipe for it? 

    Wouldn't it be super if you owned a collection of warming recipes for when it's cold, a bunch of easy and decadent chocolate recipes for Easter, Valentines and other special occasions (ehem- today!), the most impressive recipe collection for a truly spectacular Holiday season and then when you are ready- have a complete detox program planned out for you, so all that's left to do is print out a shopping list (which of course will be included too)?

    Wouldn't that be great? Well guess what!..

    It IS great, because not only can you get my entire eBook collection, but you can save 20% when you buy the bundle. That's a saving of £12.00 (approx. US $18.50) and available to you right now for the Better Raw Store :)

    Happy healthy browsing,

    x Tanya


    'Purified- Your Complete 7 Day Detox Program' is a step by step detox guide with two different raw food menu plans, one for the luxury detoxer and one for the budget detoxer, every breakfast, lunch and dinner recipe mapped out, each taking no longer than 30 mins of prep, comes complete with helpful tips, information and shopping lists.


    'Festive- The Best Raw Food Christmas Recipes' - includes the most flavour rich, luxury recipes that are not only incredible for the festive season, but any time of the year. This downloadable eBook contains 30 recipes with stunning photography.


    'Seduced- Raw Chocolate Recipes to get very excited for' - it's all in the title really. 22 gorgeous and simple to make chocolate recipes from raspberry jam centres to marzipan cigars to chocolate covered strawberries, it just keeps getting better and better. This downloadable eBook even has a superfoods glossary at the back and none of the chocolate making requires any special equipment!


    'Nourished- Comforting Raw Food Recipes For Winter' is stunning full colour eBook containing 39 of Tanya's most carefully selected recipes to feel warm, comforted and nourished during winter & beyond. Get a whole heap of extra tips on staying healthy & immunised in the cold, as well as a useful guide to seasonal local produce.


    'Thrive on this! 15 World's Healthiest Foods' is a completely free extra bonus report just for you. It outlines what the most nutrient dense foods on the planet are and why.


    Get the ebook bundle>>

    onions worth your tears don't have to make you cry

    Image source>

    You've already heard how good the onions are for you.

    Onions are a great detoxification aid for your blood and liver and the sulphur-containing amino acids (methionine and cystine) in them actually help remove heavy metals, as well as protect against mercury, cadmium and lead toxicity. That's pretty powerful stuff. When you come across foods like onions and garlic, which can fight heavy metals, you can be sure they are capable of protecting you from virtually anything. Including cancer. The antioxidants in onions help reduce your cells' DNA damage caused by free-radicals and work to kill tumour cells even when they are already present. In addition to that, just one medium onion is an excellent source of your daily needs for Vitamin C, B6, B1, K, biotin, chromium, calcium, dietary fibre and folic acid- everything you need for clean, clot-free blood with lowered sugar levels. It's not by chance that cut into halves, the onion rings look like blood cells under a microscope. Nature provides all the clues. Source: Foods Healing Power


    But why do they have to make you cry?

    As you chop up an onion, it releases lachrymatory-factor synthase enzymes, which then react with the sulfoxides. More chemical reaction occurs and as it enters the air and travels towards our eyes, it triggers nerve endings in the cornea to communicate with the brain stem. The brain registers the irritation in the eye then alerts the lachrymal gland to stimulate tear production to flush away the invader. Here comes the 'waaaaaaa'. This is in no way a bad thing, as it's another way for the onion to act as a cleanser and flush out our eyes. Source: How Stuff Works


    I don't care about the WHY, just make it stop.

    I've recently read the news about a genetically modified onion, which won't cause tears. Scientists in New Zealand (oh why NZ, why?) have developed a way to isolate and handicap the lachrymatory enzyme, which won't undergo the chemical reaction when you cut the onion, producing tear-free chopping freedom. You'd never guess what the trick is to this 'invention'! It's all about making the soil it grows in low in sulphur! The exact stuff mentioned above, which prevents cancer and protects you agains heavy metals has to be taken out of the soil for what now seems to be no longer an onion, but a by-product of it. Source: How Stuff Works


    That's not cool with me...

    So I asked you guys on Facebook to share your tricks to stop the tears, when you cut 'real' onions. Some answers made me crack up, but hey, they do make sense! And if they work, why not put on some goggles, clench a spoon between your teeth and cut the onions in a swimming pool of water? :)


    I don't want to cry over onions anymore! What is your trick to stop the eyes from watering when you cut your onions?
    346Like ·  · Share


    And the winners are...


    Do you have a special trick of your own?

    make your own kombucha (a picture tutorial)


    What is Kombucha?

    Kombucha originated in Asia around 220BC and was brought through Russia (known there as kvas) to western Europe and now it is most popular in the USA. Visiting my sis in Brooklyn is always such an event for me, as nearly every corner store there stocks a whole spectrum of Kombucha beverage flavours. For its numerous benefits, Kombucha has been given all kinds of names from 'elixir of long life' to 'divine chi' to 'miracle fungus'. It is in actual fact not a fungus or a mushroom, but rather a Scoby- a Symbiotic Colony Of [good] Bacteria and [spore-free and candida friendly] Yeast- which lives on sugary tea. It is a fermented drink, which is alcohol free (less than 0.5%).


    What are some of Kombucha's benefits?

    It is a well known source of probiotics, such as acidophilus and lactobacillus, which are also found in yoghurts. The big difference there is that Kombucha is not fermented on dairy, hence the probiotics survive their journey through the digestive tract into the gut where they are most beneficial. When good bacteria is present in your gut, that is when true balance is felt and seen from the inside out- many people take it daily on an empty stomach for improved digestion, to heal skin conditions such as eczema, to enhance the immune system and to cleanse the blood. 

    But Kombucha can also be used externally, especially for various skin ailments. If you simply add a litre of strong brew to your bath water, it will work to re-energise and heal your skin, while it absorbs through your pores. I recently learnt from my friends of Go! Kombucha that even leading cosmetic brands such as Chanel and Estee Lauder use antioxidant-rich Kombucha in their anti-wrinkle skin treatments to aid cellular renewal and help stem signs of ageing. 


    What about the sugar?

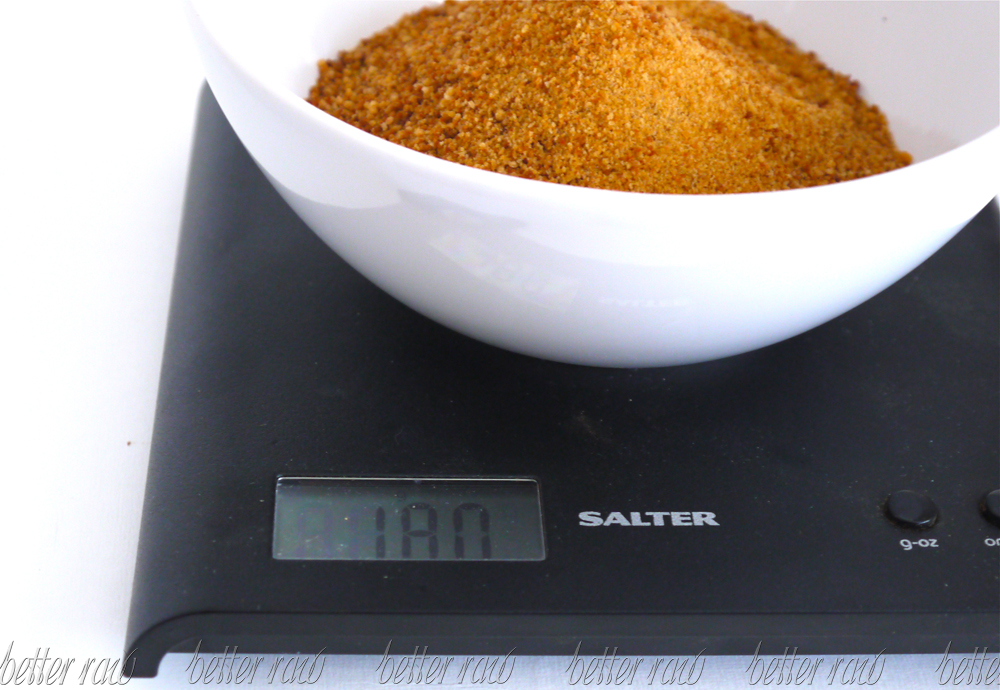
    As you'll see below sugar + tea + scoby are the only components of Kombucha aside from water and there is quite an amount of sugar which must be used, since it is what provides food for the yeast resident in the culture. I still can't bring myself to buying (i.e.. supporting the production of) white granulated sugar, so I've used various other kinds such as the coconut palm sugar, honey, maple syrup and agave. In actual fact- plenty of research out there does show that the best type of sugar to use in this process is the ordinary supermarket white stuff (doh!), which gets entirely transformed in the process to a healing beverage beyond measure. During fermentation, the sucrose is broken down into simple sugars- glucose (70% and ferments quickly) and fructose (30% and provides residual sweetness in Kombucha). Fructose is responsible for the formation of acetic acid (acting as an inhibitor to harmful bacteria), while glucose is responsible for the formation of all other organic acids (acting as detoxifiers, antibiotics and metabolisers). 


    How can I make it?

    Brewing your Kombucha beverage is extremely simple and fun, it is entirely natural and can easily become a basic routine, which takes just as much time and effort to prep as it does to make a cup of tea. It is also very hard to get it wrong, as long as you use the basic instructions below. Here's all you'll need:

    A glass jar, 2 litre minimum
    2 litres water
    180g sugar
    6g loose leaf tea
    scoby + provided liquid (see below for suppliers)


    Measure out 180g of sugar. This can be any sugar at all, as it will break down and transform during the culturing process. I use coconut palm sugar from Raw Living for that caramel hint of flavour.


    Measure out 6g of loose leaf tea. I use the best quality Japanese green tea from Chiki Tea.


    Add 2 litres of hot water, stir and let the brew cool to room temperature.


    Strain the cooled tea into a glass jar (minimum 2 litre capacity). I used a nut milk bag from Living Milk, but it can be a stainless steel strainer, cheese cloth or even stockings.


    I bought my kombucha scoby when I visited Prague, but you can easily get yours online by simply googling 'buy kombucha scoby'. UK peeps- you can get yours from either kefir-heaven.co.uk, happykombucha.co.uk or theteapot.co.uk .


    Pour the kvas/ kombucha beverage which should come with your purchased scoby or 6 tablespoons of apple cider vinegar in to the jar.


    Wash the mother culture/ scoby in warm water. Notice how there is a smooth side and a slightly rough one.


    Add the mother culture to the jar with the smooth side up. 


    If the culture sinks, make sure it has not turned over.


    Cover the jar with a kitchen roll or towel and secure with an elastic band. Transfer to a darkish spot of your house, where it will stay out of sunlight but keep at a steady temperature of 23 degrees C.  20-25 degree range is fine.


    Here's a picture taken on Day 5, but you will notice a new layer begin to form in the jar from around Day 3.  This is the new scoby or daughter culture forming, it will be as large as the surface of the jar you use.


    Here is an image taken on Day 9, looking into the jar. Kombucha is drinkable on approximately Day 8-10. Try a few variations, it is really fun to experiment, until you find your perfect tea, sugar, temperature and the amount of fermentation days.


    On Day 8-10, reach out and extract both the mother and daughter culture from the jar. 


    You can see that my mother culture changed colour because of the sugar that I used. This is absolutely fine and it can be reused over and over again.


    Transfer both scobies into a smaller container to keep and use later (both can now be used on different new batches of kombucha).


    Strain the mix for a smooth and yummy drink, which is ready to consume right away.


    To store your ready kombucha- refrigerate it in an a sealable glass bottle and remember to keep some with the culture if you want to re-use it. Your next batch will be made with either of the mother or daughter cultures and 200ml of your homemade kombucha this time.


    Enjoy it chilled at a dinner party as a mega healthy wine alternative, which could still pass to look like a white wine (if white sugar used) or take 250ml as a medicinal drink every morning on an empty stomach. 


    Have you made Kombucha before? Or at least tasted it?
    Share your views in the comments...